
Hmmmmm . . . what to do, what to do? A trip to the "Old Time Pottery" Store in our area for inspiration! I came across these sweet wine goblets that were about 8 inches tall and had ridges that were perfect little pumpkin shapes! Note the price. They were dusty and dirty but with a little soap and water, I knew I could turn these little babies into a cute pair of candlesticks for less than 10 bucks!
 =
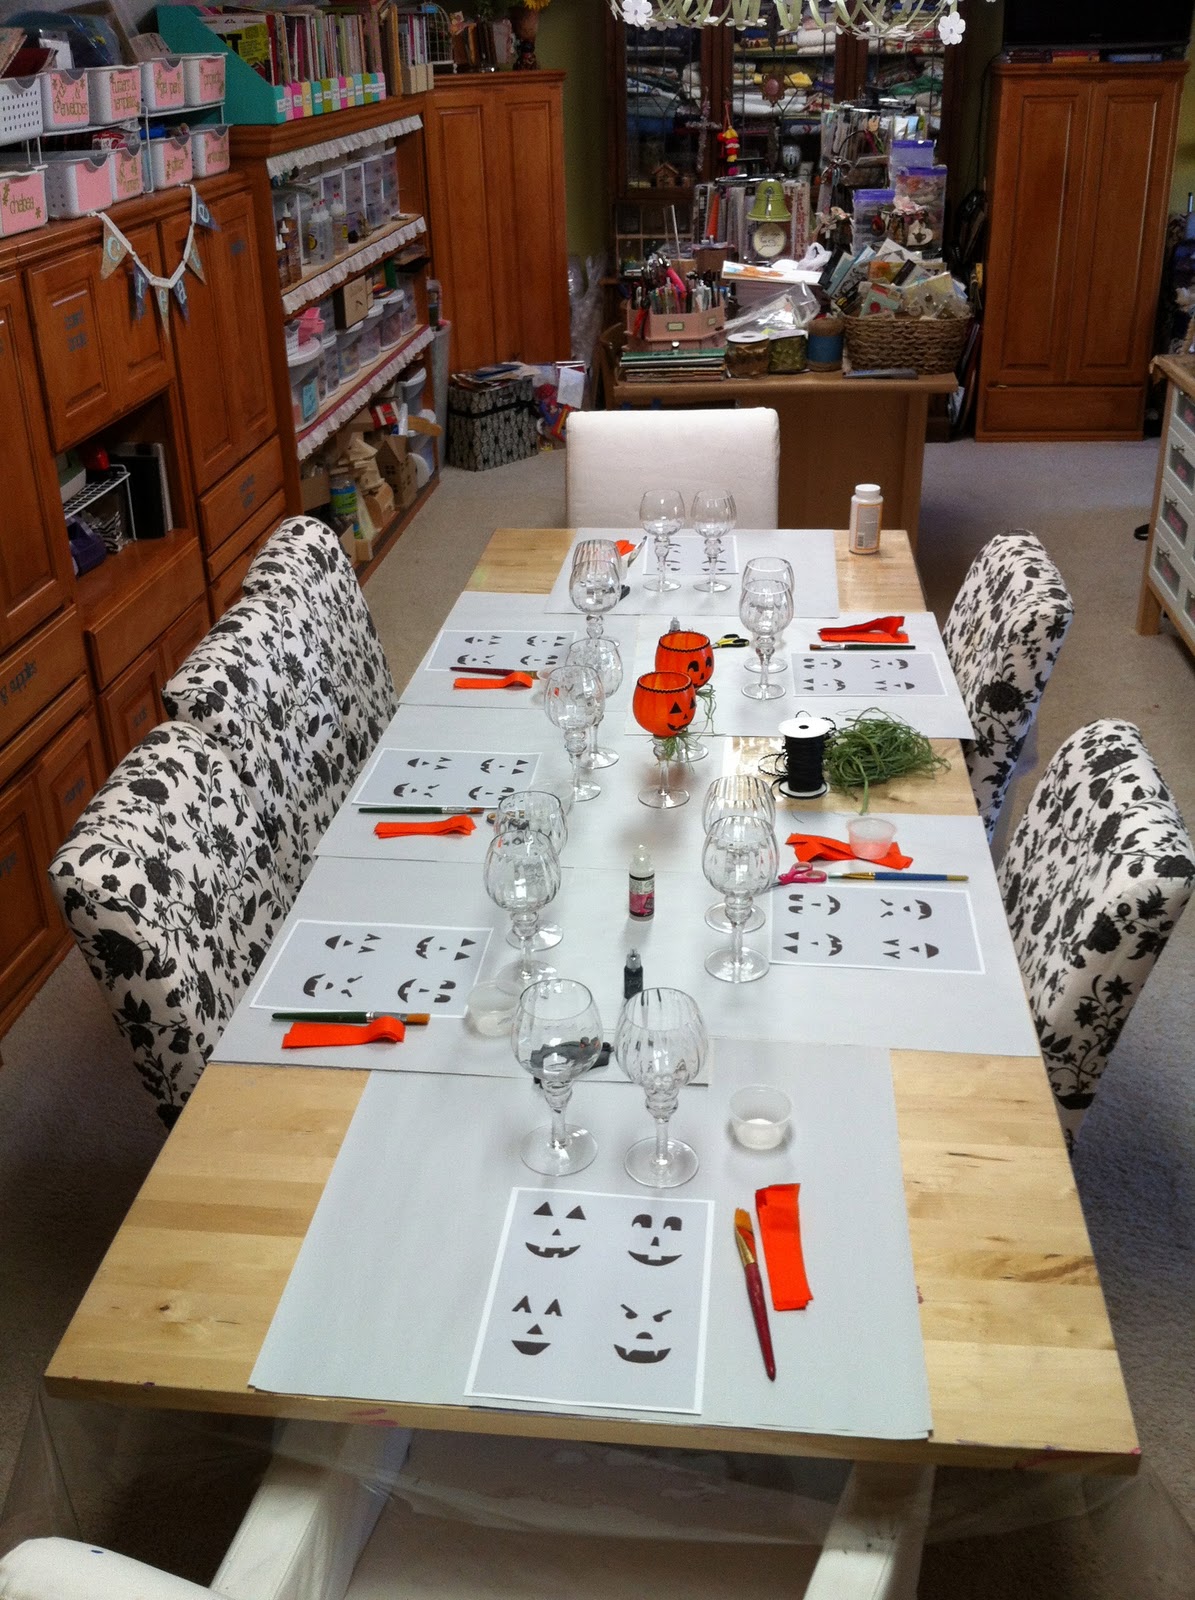
=To make these little babies, I gathered the following supplies:
2 Glass Goblets (Red Wine Size is perfect)
Mod Podge (I prefer the matte finish)
A nice flat, inexpensive paint brush
orange tissue paper (any kind will do, but I prefer art tissue because the color bleeds a bit
Black paper pumpkin face shapes (hand drawn)
Black Zig Marker
Glossy Accents
Raffia
Ric Rac
Stickles (I used black diamond)

Begin laying the tissue paper on the glass in strips and coat each strip with a thin coat of Mod Podge as shown below:

Continue to apply strips of tissue, overlapping each piece slightly until the entire goblet is covered in orange tissue. Cover the second goblet and set them both aside to let them dry. Don't attempt to trim them until they are completely dry!
While waiting for the goblets to dry, use a Zig pen or any other waterproof market and draw some simple Jack-O'-Lantern shapes on a piece of white paper. Make sure they are the proper size and dimension to fit on the tissue area of your goblet.

Once the goblets are dry, use scissors to trim along the top edge of the glass:

Run a bead of glossy accents around the upper rim of the glass - I prefer Glossy Accents to craft glues because it dries so quickly.

Attach Ric Rac to top of glass:

Carefully cut out Jack-O'Lantern face pieces, cutting inside the black so no white shows. Paint Mod Podge onto goblet and arrange face pieces. Cover face pieces with another layer of Mod Podge.


Your goblets should now look like this:

Using green raffia, take a few shredded pieces and tie a bow around the stem of the goblet as shown on the right.

To finish off your candlesticks, add a bit of dimension and sparkle by filling in the face pieces using Stickles Black Diamond. Allow them to dry completely.

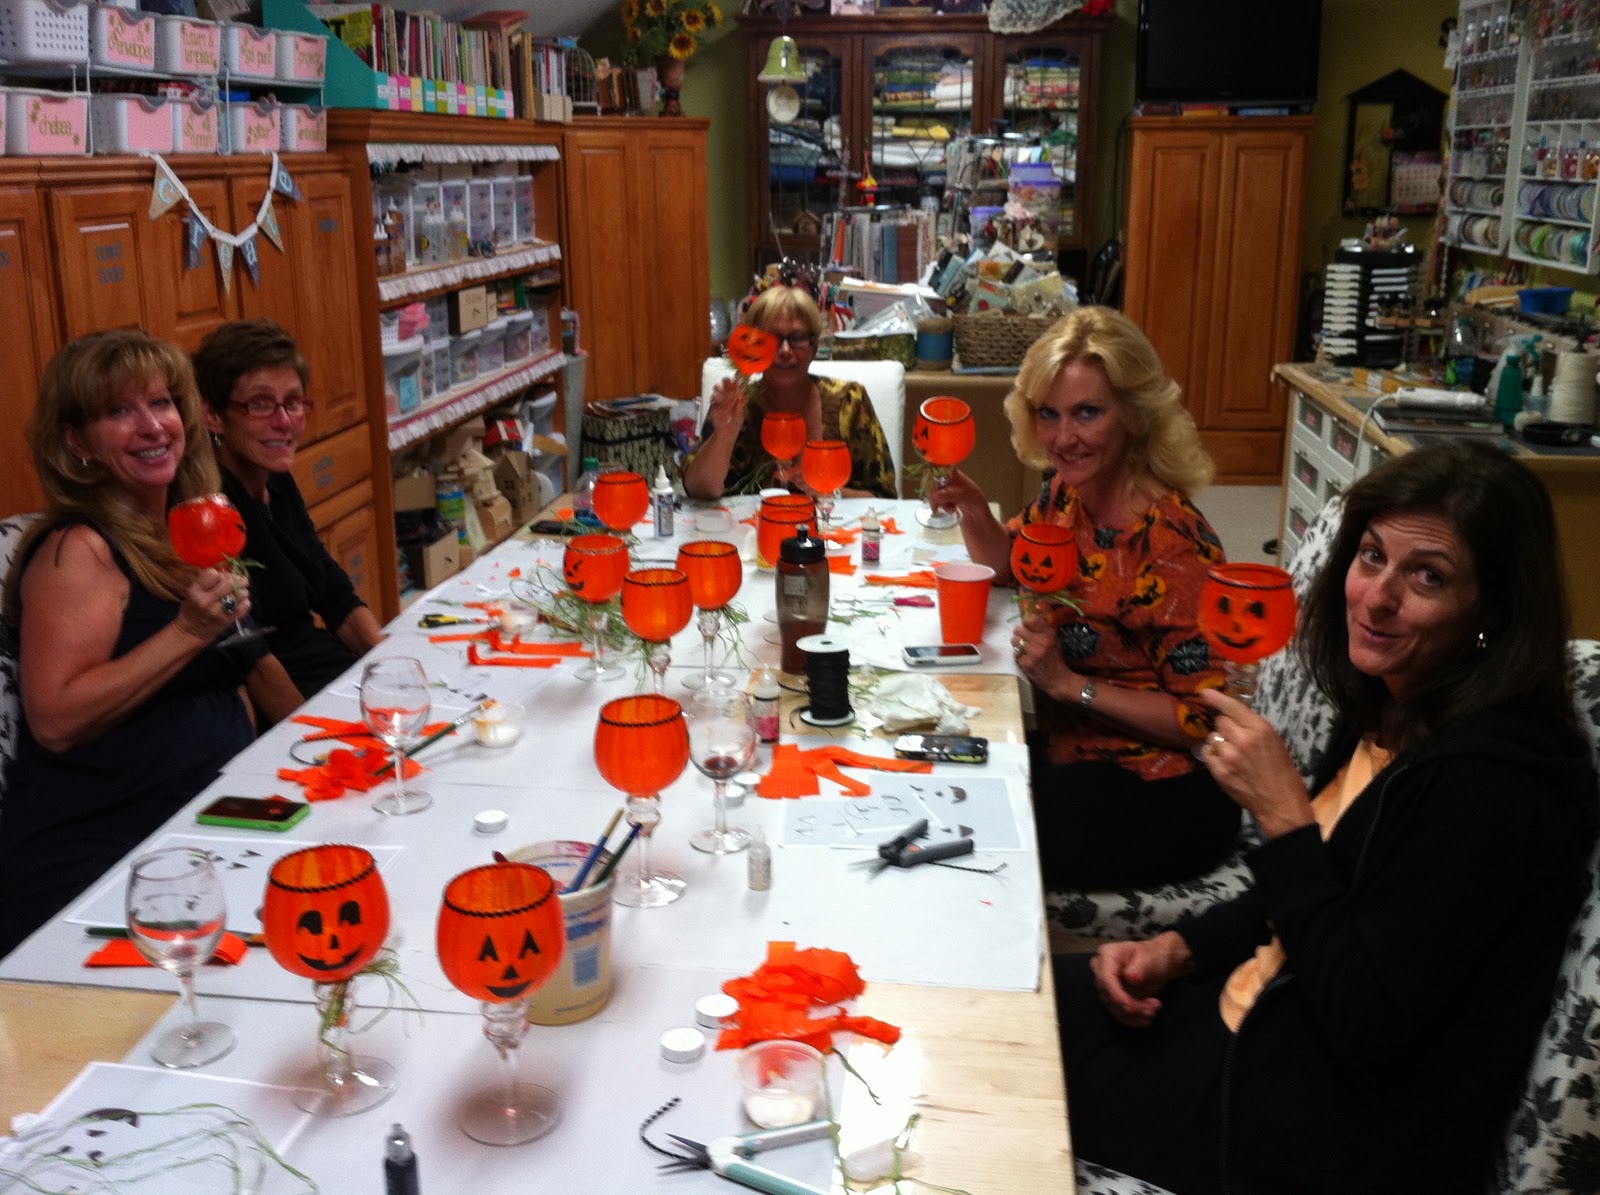
Now you have an adorable pair of Halloween candlesticks! I set up my studio to get ready for Girls' Night and my friends loved the project! Too Cute!

These are so cute - how fun. Wish I could have come and made one! :D
ReplyDeleteThese are so cute!
ReplyDeleteGreat Idea Lorraine! Looks like a fun night with friends.
ReplyDeleteOh how I miss projects like this! Remember that jack-o-lantern mosaic plate that I finished 75% of? I guess my creativity gets channeled in other ways these days. Like hosting Halloween parties for the 6 and under set. Still fun. I NEVER would have believed that I would have kids with no scrapbooks. :( Love your art and you!!! Lori :)
ReplyDeleteI found your blog through Mod Podge Rocks, and I think these are so adorable. And it just so happens to be that I have a set of mismatched glasses that I have had for years and didn't know what to do with them....Now I know!! Thanks for sharing!!
ReplyDeleteSo glad you all liked it - such a fun project and the best part is sharing! <3
ReplyDeleteThese were adorable. Little Miss Sophia wanted to make some the minute she saw them...maybe next Halloween! I want a craft day with you so soon!
ReplyDeleteHugs!